L'esprit d'escalier is that thing when you think of the perfect sharp, clever, cutting response too late to use it. I've never seen a drag queen be late with a perfect sharp, clever, cutting response.
At a party last night, I was too stunned and disgusted to come up with a good response to a co-worker who said, "Trump's really getting stuff done!" After fuming about it for most of my waking hours between then and now, I decided to have Angie, my drag queen character, respond. She'd do it better than I could, anyway.
~~~~~~~~~~~~~~~~~~~~~~~
"'Trump is really getting stuff done'? No, no, everybody, no booing. That gentleman at the bar is absolutely correct. Let's look at some of the stuff 'President' Trump has gotten done. He's encouraged white supremacists to remain silent no longer! He's given desperately-needed tax breaks to the richest one percent of the country! And he's made it legal to oppress immigrants again! We've been wanting to do that for a friggin' century, am I right? Hey, on an entirely unrelated topic, quick show of hands: who here is one hundred percent Native American? Come on, don't be shy, I won't ask you to whip out your totem pole.....no one? Really? Well, in that case, Trump can kiss my padded ass and get on a boat back to Germany, where his family immigrated from. But enough about our collective hemorrhoid. Maestro, if you would be so kind as to cue up the next song? Thank you."
(sweeping curtsy to the applauding audience)
~~~~~~~~~~~~~~~~~~~~~~~~~~~~~~~~~~~~~~~
I can't use this scene in the book because it would cement the story in our repugnant present, whereas I'm hoping the story will be somewhat timeless (although I've already had to change a line about the ability to get married -- yes, this story has been in the works since before 2015). But I had to get it out of me, and Angie took off with it.
Sunday, October 21, 2018
Tuesday, May 1, 2018
My Bullet Journal presentation from the 2017 Moonlight & Magnolias -- last part, for reals this time
Hi, all, life has been exciting because the foster kittens have been coming out to play more and more for the past couple of weeks. Everything else in existence really pales in comparison to four-week old kittens. :)
But anyway, here is the last part of my bullet journal presentation.

Anyone else have this problem while trying to write?


Someone said that when cats lie on your work, they're trying to get you to relax. I'm sure that's it.
I hope these posts have been helpful. And now I get to cross something off my must-do list! :)
Sunday, April 8, 2018
Making a back pocket for your Bullet Journal
Extra post that was not part of my Bullet Journal presentation.
Here's how to make a
back pocket for your journal if it doesn't come with one already, i.e. if you're using a composition notebook, a book-style journal, or pretty much anything that's not a Leuchtturm or official Bullet Journal notebook.
You'll need
one piece of letter-size paper and glue. Scissors optional. The pocket will
last longer if the paper is a little thicker than regular printer paper.
I got this awesome journal at a Dreamspinner Press authors workshop. As you can see, it came with a pen loop, which I highly recommend.
 |
| cat paw not included |
On to the pocket!

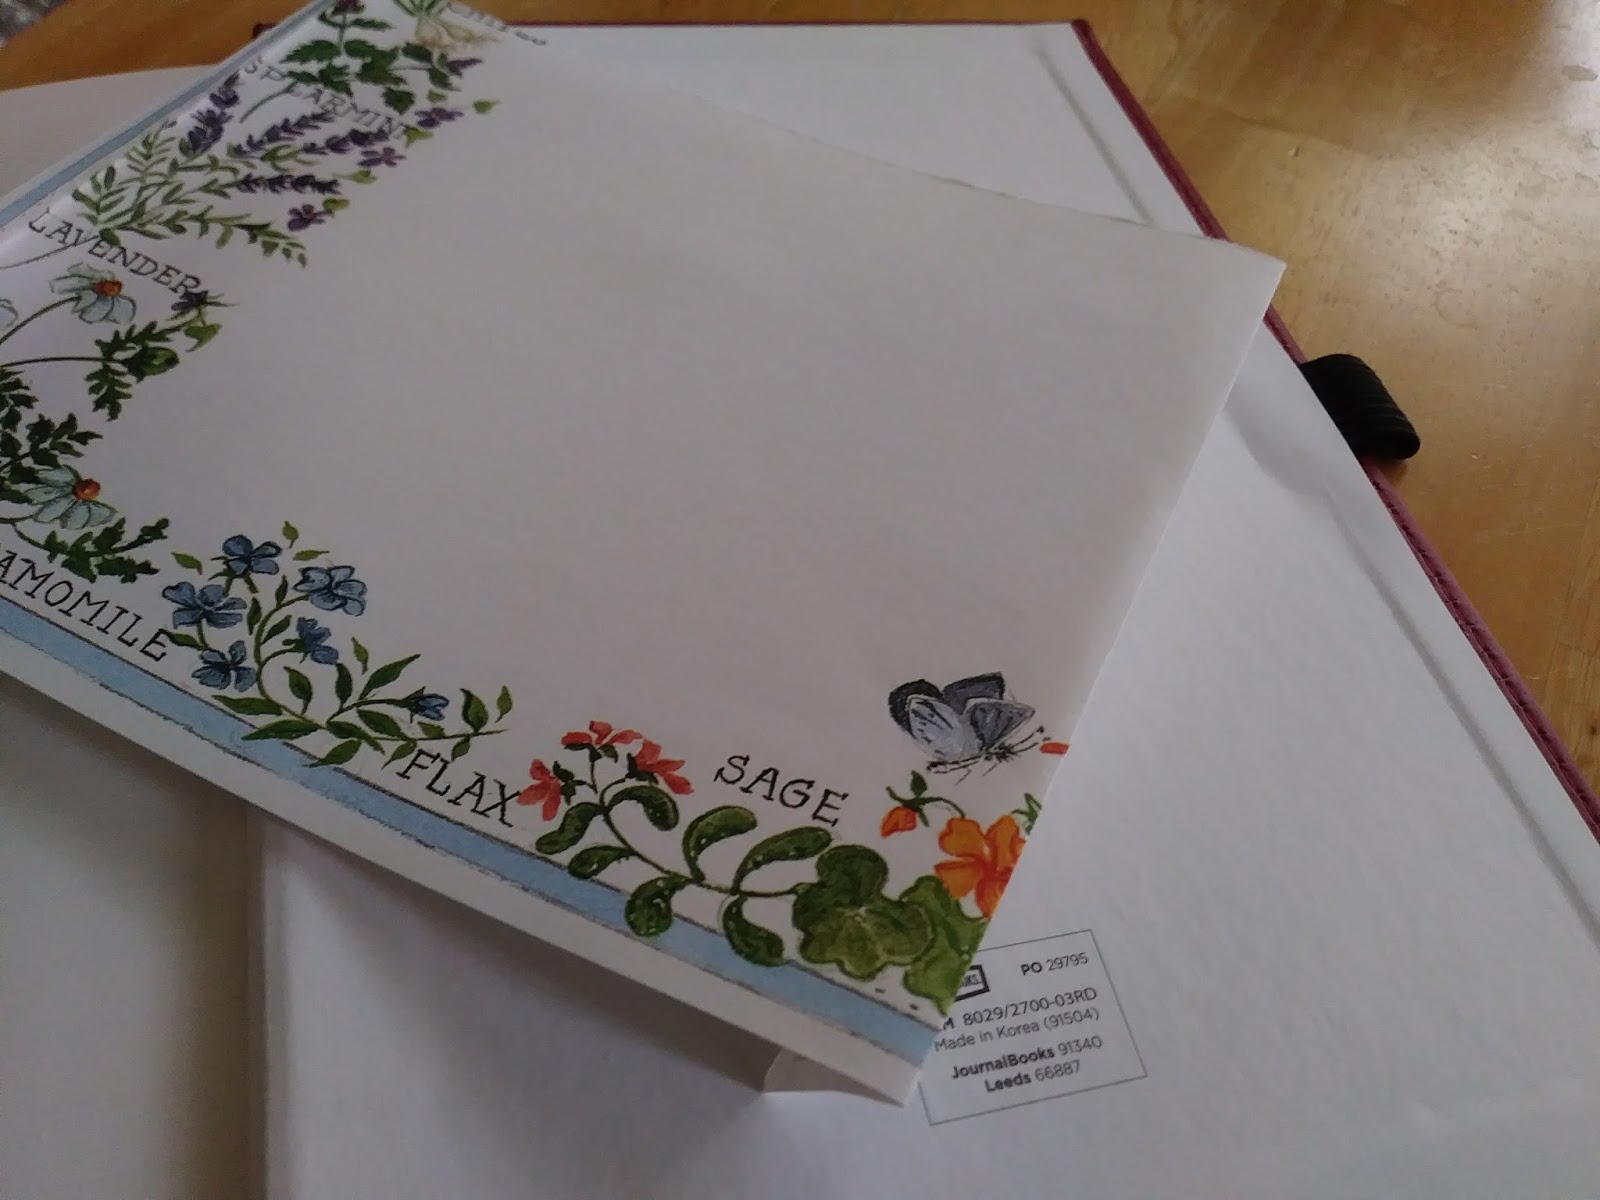
I used this paper for the pocket because it's fairly thick, has a pretty border, and I never remember to use it so it's been sitting around forever. I'm pretty sure it was part of a wedding present from a friend, and I've been married 21 years, so....yeah.
Decide how wide you want
your pocket by laying the paper against the back cover of the journal. Also decide how long (high) you want it, keeping in
mind that you'll lose about 1.5 inches of length (height) from folds at the top and bottom.
 |
| Turn paper 90 degrees for a larger pocket |
Once you've decided how wide you want the pocket, make a fold.
  |
| Handy Hint: Do your crafting in a room without cats unless you don't mind everything taking twice as long. |
Then cut or tear the paper along the fold.

Fold bottom and top edges inward about 3/8 of an inch (or less or more, depending on if your paper is patterned and how much of the pattern you want to see, or how big you want your pocket to be).

Then make a new fold about 3/8 of an inch from the first fold, this time to the back of the page.

In other words, in the opposite direction of the first fold, so you have a Z, not a C.

 |
| cat tail not included |

Note: it might be easier to do the folds in the opposite order I've listed them, but I already took the pictures, sorry. :P
Opposite order would be: fold top and bottom edges to the back, about one inch in from each edge. Then make new folds on top and bottom edges, about 3/8 of an inch in from each edge, but forward this time, to get the same Z folds you saw above.
Check against the back cover of the journal to make sure the pocket the size you want, and change the folds if you want it to be smaller. I probably should have done this pocket using the paper lengthwise instead of widthwise, but I don't need a huge pocket, so it's big enough.

Crease all folds.
Dot
some glue on the back side of the paper, all along the top, bottom, and right edges.


Press to the back inside cover of the journal. Then dot some glue inside the folds at the top and bottom edges, 3/4 of the way from the right side to the left, so the pocket will open a bit on the left side at the top and bottom.

 |
| I made a mistake with the gluing and used too much glue, so it soaked through and got wrinkly. Yours won't look like this. |
Leave the left/open side of the pocket (next to the journal binding) unglued. You can put a piece of paper in there to make sure the pocket stays open in case you got a bit wild with the glue. It can happen.


Let the glue dry for a few hours or overnight. Et voila, journal pocket!
 |
| Cat not included |
Good luck with your pen loops and journal pockets. Next post (and the last post of my Bullet Journal presentation): the only real excuse for not using your Bullet Journal.
My Bullet Journal presentation from the 2017 Moonlight & Magnolias -- part 7
Hi, all, apologies for taking so long to get to this last post in the series. Damon Suede was talking about writing every day when he said this, but it's true for almost anything:
I need to finish these posts so they'll be done and I can call it complete (you have no idea how hard finishing things is for me -- why is it so much more fun to start things than to finish them?).
The original "'neighbors" chart in my old journal needs updating, and now that our foster cat has had her kittens, I need to plan my grand extravaganza Kitten Tea Party, which, due to the state of our house, requires more planning than just which kind of sandwiches to serve. I'll work it all out in my BuJo, which means I need to work on it more, which reminds me that I need to finish these posts. :D
But enough about me, on to the nearly last part of these posts! (This post was getting too long, so I decided to split it, and then remembered I still need to post the very last part of my presentation, which will be the really last part of the presentation and these posts.)

Some tips that might be helpful:
And please keep in mind this quote I read somewhere, maybe at the official Bullet Journal site:
Start with the official site: bulletjournal.com
Google “Bullet Journal” plus these search terms for good articles/explanations:
Sites for inspiration:
"Momentum is hard won and easily lost....Writing crap is better than no writing at all."I lost the momentum of these blog posts AND my BuJo due to real-life obligations, and now I want to get back into both, but it's really harrrrrd!!
I need to finish these posts so they'll be done and I can call it complete (you have no idea how hard finishing things is for me -- why is it so much more fun to start things than to finish them?).
The original "'neighbors" chart in my old journal needs updating, and now that our foster cat has had her kittens, I need to plan my grand extravaganza Kitten Tea Party, which, due to the state of our house, requires more planning than just which kind of sandwiches to serve. I'll work it all out in my BuJo, which means I need to work on it more, which reminds me that I need to finish these posts. :D
But enough about me, on to the nearly last part of these posts! (This post was getting too long, so I decided to split it, and then remembered I still need to post the very last part of my presentation, which will be the really last part of the presentation and these posts.)

Some tips that might be helpful:
- Use a dark pen for the actual writing. It helps if you're "of a certain age" like I am, or if you want to back up your journal by taking a photo of the pages or scanning them.
- Write legibly. Slow down. Write with intention. Reflect.
- Put your contact info in the front of the journal, and maybe a note about why it's important to you. But not that it's too important to you. Something that will encourage the finder to return it to you but not hold it for ransom.
- Number 10-12 pages at a time. When I'm at the start of a journal, it's hard for me to write the numbers because the stack of pages are higher than the table, so here's my tip for that -- push the corner of the page up so you can rest your hand on the next page. (Yes, this is not at the beginning of the journal, but you get the idea, right?)
 |
| I just realized how weirdly I hold my pen. |
- Do a year's worth of Future Log at front of the journal (so it's easy to flip to), starting with the next month. If you get to the end of the months and you're still on the same journal, put the next months at the back of the journal (so it's easy to flip to).
- Goals -- list these on pages you'll revisit. Add a daily, weekly, or other regularly scheduled task to go look at those pages, otherwise you might forget like I do. Break down your goals into small, realistic pieces, and schedule them realistically.
- Use colored pens/pencils for Habit Trackers or anything else you track. Color in boxes/spaces/designs as you reach goals or hit milestones -- it's a fun incentive to get something done, besides the feeling of accomplishment just from getting something done.
Overall tips/things to keep in mind:
- If it isn't working, change it. Remember, the Bullet Journal is a highly CUSTOMIZABLE organization system, so customize it until it works for YOU.
- Anything you need to brain dump -- make a page for it and index it.
- Look at your BuJo before going to bed and before leaving the house in the morning -- you might have written down things you need to take with you.
- It takes a little time to do each day, but remember -- intention. Thinking about what you're doing, what you've done, what you're going to do.
- Get inspiration from other people's journals from time to time (but don't compare your journal to other people's). Sometimes you'll run across a genius idea that will solve a problem for you or help you understand something or just inspire you to do better with your own journaling or habits you want to cultivate.
And please keep in mind this quote I read somewhere, maybe at the official Bullet Journal site:
"The only wrong way to use a bullet journal is to not use it."
Start with the official site: bulletjournal.com
Google “Bullet Journal” plus these search terms for good articles/explanations:
- wtf buzzfeed
- popsci
- Hacks
- frowl.org worst blog
- life hacker
- Busy Families
Sites for inspiration:
- Boho Berry
- Page Flutter [good for writers]
- Tiny Ray of Sunshine
- Bullet Journal Addict
In my next post, I'll show you how to make a back pocket for your journal if it doesn't have one already, and the last post will explain the only REAL excuse for not using your Bullet Journal.
In the comments, please let me know if you run across any other good sites. Happy Journaling and Happy Writing!
In the comments, please let me know if you run across any other good sites. Happy Journaling and Happy Writing!
Monday, February 12, 2018
My Bullet Journal presentation from the 2017 Moonlight & Magnolias -- part 6
Sorry, all, I'm late posting this part because I've been crafting like crazy for a friend's wedding that's in TWO WEEKS!!!! And because I forgot to write it in my Bullet Journal. Oops!
Anyway, moving on. :) This section of the presentation is about the beauty of the Bullet Journal -- literal and figurative.
If you're not familiar with the literal beauty of Bullet Journals, check out pictures of Habit Trackers and Mood Mandalas and other fun, colorful things at Instagram and Pinterest. You can also get a lot of inspiration from YouTube -- videos of how to do different types of lettering, for example. I find taking a few more seconds to write out the date and day in a style different from my own handwriting can jog me out of an unthinking rut and make me more aware of the day that's coming up.
There are also tons of decorations out there you can play with -- washi tape, stickers, stencils, rubber stamps. I'm not going to link Etsy here because you should only go looking there if you have at least two hours of spare time. It. Is. Addictive. :D The literal beauty of bullet journals is never-ending.
For me, the figurative Beauty of the BuJo is the Migration. Remember back in part 1 of these posts, when I talked about how To-Do lists intimidate me? An unfinished task on a To-Do list either looms over me, squatting on the list, or it's there for so long that my eyes just stop seeing it completely and I forget about it.
In the last post, I explained that Migration is moving an unfinished task from the current day to the next day. For me, it makes the Daily Log a more dynamic version of a To-Do list, so even if the same task shows up again and again, it doesn't feel like it's squatting/looming, and because I write it again if I don't get it done, I don't stop seeing it, either.
"Isn't writing the same unfinished task over and over kind of a pain in the rear?" I hear you ask. The answer is, "Yes." And that's the point.
Migration makes you think about WHY a task is on your list. Why it didn't get done that day, and how it will get done tomorrow.
If it's a small task, something that will take only a few minutes, and yet I've migrated it more than twice, I'll throw up my hands and tell myself, "Just do it!" Then it's done and I can put an X over the dot.
If it's a big task not getting done, it might be a Project. You may need to break it into smaller tasks.
If it's a task that you keep migrating, then you need to ask: do I really need to do it? If the answer is "No,", cross it out. Declutter your life.
If the answer is "Yes," so you need to migrate the task yet again, you need to think about WHY you keep putting it off.
Migration is not just for getting things done (eventually), it's also to reflect on why you're doing what you're doing. Are the tasks you've set for yourself important? Are you making the best use of your time? Will this task enrich my life?
Migration also makes you schedule tasks realistically. You can't do 50,000 things in one day. If you schedule 50,000 things on a day, you're setting yourself up for failure.
A migrated task is marked with a right-arrow. There's also a use for a left-arrow: scheduling. That's when you can't get to a task on that day, and you know you won't get to it on the next day, so instead of Migrating it to the next day, you Schedule it for a future date in your Monthly Log or even your Future Log.
On one hand, Scheduling keeps your task "active". You won't lose it; you'll get to it someday.
On the other hand, for procrastinators like me, Scheduling means casting a task into the nebulous future instead of getting it done in the concrete present. It's part of the "schedule tasks realistically" idea. If you can't get something done on that day or in the next few days, it might be better to leave it on your Monthly or Future Log. It's okay to not get everything done at once. It would be unrealistic to expect to get everything done at once.
One of the biggest BuJo fails I had was with my Habit Trackers. I was calling them "Dailies" because it was a list of everything I wanted to do every day. ("Habit Trackers" are more about good habits you want to cultivate by doing certain tasks every day.) I had a Dailies list that took up an entire page. There were about 25 items on it, and day after day, I failed to get most of them done. I finally went through and took a guess at the number of minutes each task would take. Turns out I'd set myself tasks that would take, in total, about four hours every day to complete, and that wasn't including things like feeding and playing with the cats or spending some time with the spousal unit.
If I were a more disciplined person, maybe I could fit those four hours of tasks into my day, but I like having some free time, some down time. By not being realistic about what I would--and would--do, I set myself up for failure.
Now my Habit Trackers are the bare minimum, things I REALLY want to get into the habit of doing, things I know would make my life better, like getting to bed at a reasonable time, getting exercise, remembering to take my vitamins, etc. I don't always get them done, but getting to color in a pretty chart is a small incentive. :)
In the past few blogs, you've learned how to start your Bullet Journals with your Index and Future Log. You've created a Monthly Log for the current month, and I hope you're keeping up with Daily Logs. You now know how to migrate tasks you didn't get done, and you know about crossing off tasks if they're really not necessary/important/improving your life in some way.
In the next post, which will be the last post in this series, I'll give you a few tips and other ideas to keep in mind, and hopefully post some pictures so it will be more interesting than this one. :)
Monday, February 5, 2018
My Bullet Journal presentation from the 2017 Moonlight & Magnolias -- part 5
The Basics of the BuJo, continued, because I droned on too long about notebooks in the last post.

Last post we started our journals by labelling the first two pages as the Index, then taking the next few pages for the Future Log (six months or longer), then we started a Monthly Log for February. We also touched briefly on Daily Logs.
Daily Logs are the heart of the BuJo. I mentioned Tasks (dot), Notes (dash), and Events (circle). What I didn't get to was Rapid Logging.
Rapid Logging just means writing short sentences. Ideally, what you write for each Task, Note, or Event will fit on a line. Ryder, the creator of the Bullet Journal, has a interesting idea behind Rapid Logging: besides getting your thoughts down quickly, each rapid-logged line has the same emotional weight.
So on a single day, you might have "grocery shop", which is a task, "Austin moon towers" which is a note about something interesting you heard about, and "signed divorce papers", which is an event. Each of those items should fit on one line as you Rapid Log them.
You probably have some feelings about the "signed divorce papers" event. Instead of fitting it all on that line, go ahead and find a blank space in your journal to write out your feelings about signing divorce papers. Or about Austin moon towers. Or even about grocery shopping. Most of us probably don't have very strong feelings about grocery shopping, but for someone who used to be on food stamps, each trip to the grocery store might be a sort of triumph or a reminder of how far they've come.
A section of writing that's longer than a rapid-logged line is called a Narrative.
When I first started a BuJo, I thought I had to put the narrative on a separate page, but then I saw an example online where the person just put a line right on that day's Daily Log, dividing the Narrative from the rest of the Daily Log, and another line at the end of the Narrative, so she could pick back up with the Daily Log. It made a lot of sense and was even kind of artistic. Mine are not artistic, but I still like the idea, so now I just slap my Narratives down right in the daily log, letting it go onto the next page if necessary (I just note at the top of the page that the day is continuing).
Of course, you can always put a Narrative on a separate page, or put all Narratives in a group. Customize!
To mark Narratives, I use an N as a Signifier, which is a mark that helps a particular task/note/event stand out on the page.
I note Narratives and Cat Narratives in the Index, and then when I flip to the page later, I can easily find the Narrative by looking for the Signifier, usually on the left side of the page. Check out the official Bullet Journal site for examples of Signifiers.
Now you know how to Rapid Log your Tasks, Notes, and Events, and how/where to put your Narratives when you feel the need to write more than just a quick rapid-logged line.
The two other main BuJo basics are Migration and Collections.
Migration is moving a task from one day to the next day. It's used when you don't get a task done on the day it was scheduled. You write the task on the next day's Log, then you mark the task on today's log with a right-arrow instead of an X, indicating that the task has been migrated instead of completed. There's a purpose to migration, which I'll talk about in the next blog post.
Collections are to literally collect all the random stuff from your Daily Logs. I don't really use Collections because when I first started my BuJo, I didn't understand them. I tend to rely on my index to find grouped items, because I'll have a line for them and list the page numbers they show up on, like Cats, Knitting, and English Country Dance.
But when I was preparing to give this presentation last fall, I read a good blog post at the official Bullet Journal site, and now I understand how Collections are supposed to work: you collect information in specific categories by writing that information on pages labeled for those categories. For example, I could go through and put all my Cat information on a page labelled "Cats". Then I could glance at that page and find the names of all the foster cats/kittens we've had, find out when I last gave our cats Revolution, see how much the last Chewy order was. The way I find that information now is to look at my Cats index line, go to the pages I wrote Cat stuff, and look for the "C" signifier on the page. It takes more time than if I had a single Collections page for "Cats Revolutioned", for example. (Dang it! That reminds me, I need to Revolution the outside cat!)
The pros of Collections are having all that info in one place. The cons are having to write all that information in one place. I can find information fairly quickly by keeping my index up to date, which doesn't always happen. Anyway, you might try both collecting and indexing, and seeing which method works best for you. It might end up being a combination of the two, with some categories suiting Collections better than others.
One more thing to wrap up BuJo Basics: some BuJo hacks for writing.
I use a W as a signifier for Writing. So if I have a story idea or get some craft or publishing info to look up later, or someone recommends a book, I mark those notes with a W. I have an Index line for Writing, so every time I mark something with a W, I index it. I also have an index line for my WIP(s), which I can cross-reference in the index with the W signifiers if I want.
This next point is not so much a hack as a suggestion. As writers, we should take some time every day to pay attention to things that happen to us or to other people. We should write a few lines of Narrative in our Bullet Journals, because after all, they are journals.
As romance writers, we should especially be paying attention to feelings. We should write a few lines about how certain tasks, thoughts, or events make us feel, because romance is all about the feels.
Let me know if I've thoroughly confused you yet. Next post will be next Sunday, because I got a lot of stuff to do this week. :) Happy journaling!

Last post we started our journals by labelling the first two pages as the Index, then taking the next few pages for the Future Log (six months or longer), then we started a Monthly Log for February. We also touched briefly on Daily Logs.
Daily Logs are the heart of the BuJo. I mentioned Tasks (dot), Notes (dash), and Events (circle). What I didn't get to was Rapid Logging.
Rapid Logging just means writing short sentences. Ideally, what you write for each Task, Note, or Event will fit on a line. Ryder, the creator of the Bullet Journal, has a interesting idea behind Rapid Logging: besides getting your thoughts down quickly, each rapid-logged line has the same emotional weight.
So on a single day, you might have "grocery shop", which is a task, "Austin moon towers" which is a note about something interesting you heard about, and "signed divorce papers", which is an event. Each of those items should fit on one line as you Rapid Log them.
You probably have some feelings about the "signed divorce papers" event. Instead of fitting it all on that line, go ahead and find a blank space in your journal to write out your feelings about signing divorce papers. Or about Austin moon towers. Or even about grocery shopping. Most of us probably don't have very strong feelings about grocery shopping, but for someone who used to be on food stamps, each trip to the grocery store might be a sort of triumph or a reminder of how far they've come.
A section of writing that's longer than a rapid-logged line is called a Narrative.
When I first started a BuJo, I thought I had to put the narrative on a separate page, but then I saw an example online where the person just put a line right on that day's Daily Log, dividing the Narrative from the rest of the Daily Log, and another line at the end of the Narrative, so she could pick back up with the Daily Log. It made a lot of sense and was even kind of artistic. Mine are not artistic, but I still like the idea, so now I just slap my Narratives down right in the daily log, letting it go onto the next page if necessary (I just note at the top of the page that the day is continuing).
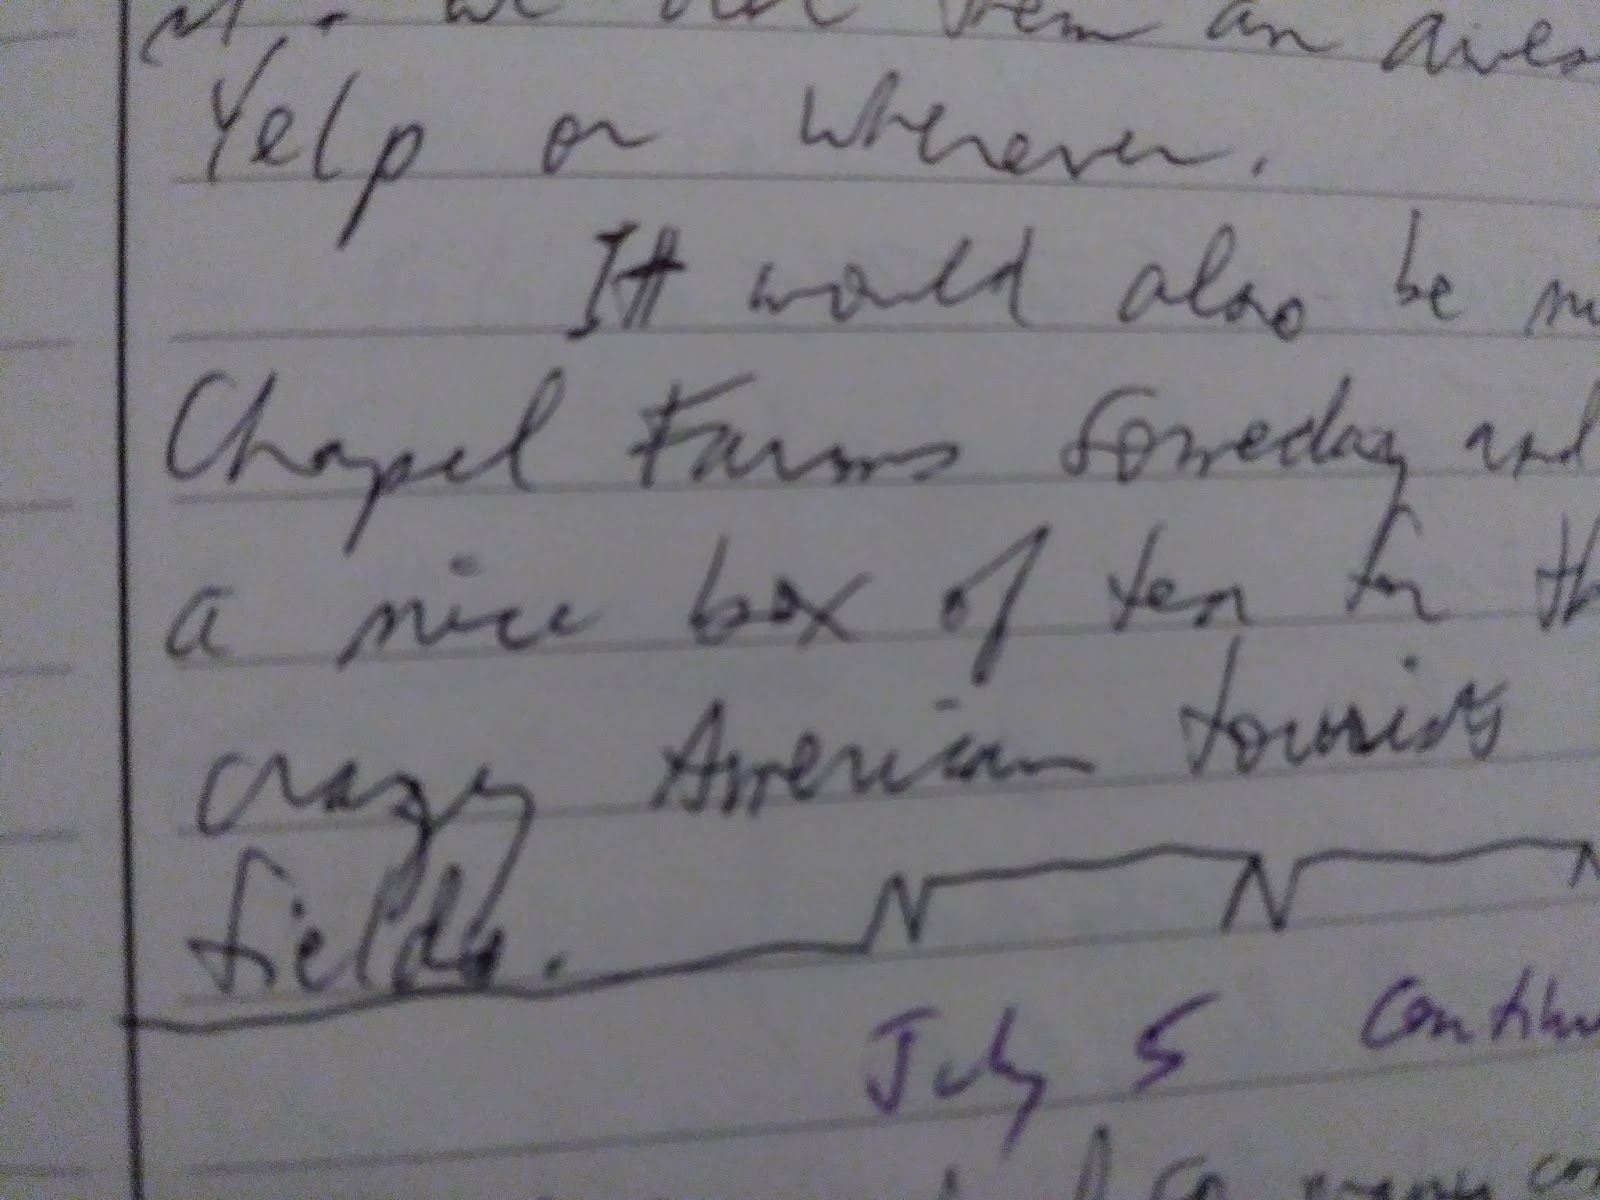 |
| A line with Ns, marking the end of a Narrative section in a Daily Log |
To mark Narratives, I use an N as a Signifier, which is a mark that helps a particular task/note/event stand out on the page.
 |
| My Narrative about the eclipse |
When I write about our cats, I use a C.
 |
| Cs next to Cat events/tasks/notes, and joined-up Cs for a Narrative about cats |
I note Narratives and Cat Narratives in the Index, and then when I flip to the page later, I can easily find the Narrative by looking for the Signifier, usually on the left side of the page. Check out the official Bullet Journal site for examples of Signifiers.
Now you know how to Rapid Log your Tasks, Notes, and Events, and how/where to put your Narratives when you feel the need to write more than just a quick rapid-logged line.
The two other main BuJo basics are Migration and Collections.
Migration is moving a task from one day to the next day. It's used when you don't get a task done on the day it was scheduled. You write the task on the next day's Log, then you mark the task on today's log with a right-arrow instead of an X, indicating that the task has been migrated instead of completed. There's a purpose to migration, which I'll talk about in the next blog post.
Collections are to literally collect all the random stuff from your Daily Logs. I don't really use Collections because when I first started my BuJo, I didn't understand them. I tend to rely on my index to find grouped items, because I'll have a line for them and list the page numbers they show up on, like Cats, Knitting, and English Country Dance.
But when I was preparing to give this presentation last fall, I read a good blog post at the official Bullet Journal site, and now I understand how Collections are supposed to work: you collect information in specific categories by writing that information on pages labeled for those categories. For example, I could go through and put all my Cat information on a page labelled "Cats". Then I could glance at that page and find the names of all the foster cats/kittens we've had, find out when I last gave our cats Revolution, see how much the last Chewy order was. The way I find that information now is to look at my Cats index line, go to the pages I wrote Cat stuff, and look for the "C" signifier on the page. It takes more time than if I had a single Collections page for "Cats Revolutioned", for example. (Dang it! That reminds me, I need to Revolution the outside cat!)
The pros of Collections are having all that info in one place. The cons are having to write all that information in one place. I can find information fairly quickly by keeping my index up to date, which doesn't always happen. Anyway, you might try both collecting and indexing, and seeing which method works best for you. It might end up being a combination of the two, with some categories suiting Collections better than others.
One more thing to wrap up BuJo Basics: some BuJo hacks for writing.
I use a W as a signifier for Writing. So if I have a story idea or get some craft or publishing info to look up later, or someone recommends a book, I mark those notes with a W. I have an Index line for Writing, so every time I mark something with a W, I index it. I also have an index line for my WIP(s), which I can cross-reference in the index with the W signifiers if I want.
This next point is not so much a hack as a suggestion. As writers, we should take some time every day to pay attention to things that happen to us or to other people. We should write a few lines of Narrative in our Bullet Journals, because after all, they are journals.
As romance writers, we should especially be paying attention to feelings. We should write a few lines about how certain tasks, thoughts, or events make us feel, because romance is all about the feels.
Let me know if I've thoroughly confused you yet. Next post will be next Sunday, because I got a lot of stuff to do this week. :) Happy journaling!
Wednesday, January 31, 2018
My Bullet Journal presentation from the 2017 Moonlight & Magnolias -- part 4
Welcome back to my Bullet Journal Presentation! Today we're going to get into the Basics of the BuJo.

The only real requirements to start a Bullet Journal are: a notebook and a pen.
A six-inch ruler is nice to have but not necessary.
Notebooks: I used a Composition book for my first journal.

The only real requirements to start a Bullet Journal are: a notebook and a pen.
A six-inch ruler is nice to have but not necessary.
Notebooks: I used a Composition book for my first journal.
- Pros: they're cheap, which is good if you're not sure you'll continue with the system and don't want to spend a lot of money on something you'll give up on after a week. (However, the system is so customizable, I can't imagine anyone giving up after a week. If it's not working, just change it!)
- Cons: really too big to carry around easily, and ink can bleed through the paper.
- Use if: you carry a backpack instead of a small purse, and if you're going to write with a ballpoint pen instead of a felt-tip or any kind of fancy ink pen.
The ideal/recommended notebook for Bullet Journaling is the actual Bullet Journal notebook. A lot of people also use a Leuchtturm 1917 notebook. Both of these notebooks are about 5"x8", use a dot grid instead of lines (ruled), and have nice thick paper that ink won't bleed through.
They're also both pretty expensive, which is why I didn't start out with one of them. Since I haven't used them, I can only guess at the Pros and Cons, but I'll take a shot.
Generally, two pages are enough for the index.
Go ahead and number the first ten pages or so, including the index pages. Just start from 1, in the bottom corner of the page, and go up to ten, number both sides of the page (so the first five pages will get you to 10). Try to make the page numbers as legible as possible to help with indexing and finding information later.
The next thing is to set up your Future Log. The official BuJo site has you set up six months' worth of space, but I've found setting up entire year is more useful for me.
To set up a Future Log, you divide each of the next few pages into thirds, and write the upcoming month names on each section. Start with the following month, not the current month, since the current month will go on your Monthly Log page. So for six months, you'd use two pages. For a year, you'd use four pages. You can also make each Future Log month more than one third of a page -- February is the shortest month and yet somehow my Future Log February is completely jammed.
Into these Future Log months you will put upcoming things you know about now, and you'll add new ones as they come up. For example: deadlines, trips, birthdays, theater tickets, weddings. Go ahead and put in everything you can think of right now. AND make sure you list "Future Log" in your index, along with the pages your future log is on. They will probably be something like pp. 3-4 or 3-6.
Helpful tip learned from painful experience: keep your Future Log in the front of your journal. Or in the very back if you like, but somewhere that you can quickly flip to it. I tried to have a "rolling" Future Log once, dropping off the finished month and adding a new one six months in advance. What a mistake. Even though I knew what page it was on, I still had to flip pages to find is vs. leaving it at the front of the journal.
Since this post will go up on January 31, let's go ahead and start our Monthly Log with February. On the next blank left-hand page, write February at the top, then list the days down the page. Since my current journal is ruled, and there aren't 30/31 lines on one page let alone 28, I let my Monthly Log run onto the facing page. Go ahead and also put a letter for the day of the week on the left side of the number of the day. For example, Feb. 1 is a Thursday, so to the left of 1, you'll write Th, to the left of 2, you'll write F, and so on.
Here's my Monthly Log for January.
Like your Future Log, go ahead and fill in all the things you know about now. As each new month rolls around, you'll flip to your Future Log, find the corresponding month, then copy all that month's events from the Future Log into the current Monthly Log. For example, in my Future Log on the right side, you can kind of see that I have Jan. 18: pay Visa bill. Then, on the January Monthly Log, I have Pay Visa bill on Jan. 17 (I decided to move it up a day since I tend to ignore my reminders for a day or two).
On the facing page, write down all your Must Do-s for the month, then see where you can fit them into the month, which you have spread before you, ready to be filled up. I didn't do that for January, which is why it's January 31 and a lot of my Must Do-s are not done. That is user error, not a BuJo failure. :P
I find my Must Do-s list is most effective if I write only the truly Must Do-s, and not my Should Do-s or Want To Do-s. It keeps the list from getting diluted and makes me focus more on getting done the things I really need to get done. I can always make separate lists of SDs and WTDs and add them to the calendar once the MDs are on there.
So you've got your Future Log and your Monthly Log. I'll do one more Log, and then save the rest of the basics for the next post, since this one is getting reeeeeaaaalllly long.
The last log is your Daily Log, and this is where you get stuff done. That is, it's where you list your To-do items, called Tasks. It's also where you keep track of events that occur on that day, or ideas you get, or Deep Thoughts you may have about anything that crosses your mind.
Tasks are listed with a dot to the left of them. Events have a small circle to their left, and Notes have a dash. When a Task is completed, you put an X over the dot. If it's a really important task, you can mark it with a star. I mark mine with five dots (one in the middle and four in the corners) so I can still cross it off with an X when I'm done.

If you don't get the task done the day you scheduled it for (copied from your Monthly Log, the same way you copied Monthly tasks from your Future Log, or something that came up recently), you put a right-arrow over the dot and move it to the next day. This is called Migration, and I'll talk more about it in a future post.
Next post will be on February 3, and I'll finish the Basics of the Bujo, including Rapid Logging, Migration, Narratives, Collections, Signifiers, and my own BuJo hacks for writing. Now I have to wrap up -- the foster cat really wants to walk on the keyboard, so I need to go cuddle her.
Let me know how the BuJo process goes for you!
They're also both pretty expensive, which is why I didn't start out with one of them. Since I haven't used them, I can only guess at the Pros and Cons, but I'll take a shot.
- possible Pros: small enough to carry in a purse, dot-grid which is said to be more flexible for writing, drawing, charts, graphs, etc. than ruled (lined) paper, thick paper that ink won't bleed through, pocket in the back.
- possible Cons: bloody expensive for a damn notebook, no matter how fabulous it is.
- possibly good to use if: you carry a purse instead of a backpack, will use a variety of pens.
Yoobi (sold at Target) makes a 5"x8" notebook for about $6, but I think it's ruled, not dot-grid. That would have been my next step if I hadn't found some nice little dot-grid notebooks on sale for $11. I haven't used them yet, because I have another Dreamspinner Authors Workshop journal and a moleskine journal to use up first. The rules of First In, First Out are rigid and unyielding. :)
For pens, I got a set of colored pens with really sharp points that make my writing thin and sometimes hard to read in the scans. I use those mostly to color in my Habit Tracker (more on that in a later post). The pen I'm using now is a Pentel R.S.V.P. ballpoint pen, black, medium point (1.0 mm). It makes nice thick lines that my elderly eyes can see better. I got a five-pack at Target or possibly a grocery store.
Feel free to use the comments section to suggest notebooks and/or pens that you like.
But let's get back to the Basics of the BuJo. They are your Index, Future Log, Monthly Log, Daily Log, and Collections. The Monthly Log pages will include a list of Must Do-s. The Daily Log will have tasks, notes, events, and narrative. Of course you can have all kinds of other stuff -- remember, highly customizable -- but those are the basics. You don't ever need to do more than those, and you can always do less because, say it with me: highly customizable. :D
The first thing to write, maybe on the inside cover, is your email or phone number so the notebook can be returned to you if you lose it. Hopefully that will never happen, but that's why some people (myself included) back up their journals by scanning them.
The next thing to do is set up your Index, which is where you will record the page number of everything you write in the BuJo. So simple, and yet so helpful to be able to find everything quickly.
 |
| you don't have to index your index like I did here |
Go ahead and number the first ten pages or so, including the index pages. Just start from 1, in the bottom corner of the page, and go up to ten, number both sides of the page (so the first five pages will get you to 10). Try to make the page numbers as legible as possible to help with indexing and finding information later.
 |
| example of page numbers |
The next thing is to set up your Future Log. The official BuJo site has you set up six months' worth of space, but I've found setting up entire year is more useful for me.
To set up a Future Log, you divide each of the next few pages into thirds, and write the upcoming month names on each section. Start with the following month, not the current month, since the current month will go on your Monthly Log page. So for six months, you'd use two pages. For a year, you'd use four pages. You can also make each Future Log month more than one third of a page -- February is the shortest month and yet somehow my Future Log February is completely jammed.
 |
| See Feb. in bottom right corner of pic, completely jammed |
Into these Future Log months you will put upcoming things you know about now, and you'll add new ones as they come up. For example: deadlines, trips, birthdays, theater tickets, weddings. Go ahead and put in everything you can think of right now. AND make sure you list "Future Log" in your index, along with the pages your future log is on. They will probably be something like pp. 3-4 or 3-6.
Helpful tip learned from painful experience: keep your Future Log in the front of your journal. Or in the very back if you like, but somewhere that you can quickly flip to it. I tried to have a "rolling" Future Log once, dropping off the finished month and adding a new one six months in advance. What a mistake. Even though I knew what page it was on, I still had to flip pages to find is vs. leaving it at the front of the journal.
Since this post will go up on January 31, let's go ahead and start our Monthly Log with February. On the next blank left-hand page, write February at the top, then list the days down the page. Since my current journal is ruled, and there aren't 30/31 lines on one page let alone 28, I let my Monthly Log run onto the facing page. Go ahead and also put a letter for the day of the week on the left side of the number of the day. For example, Feb. 1 is a Thursday, so to the left of 1, you'll write Th, to the left of 2, you'll write F, and so on.
Here's my Monthly Log for January.
 |
| monthly log for January -- see Must Do-s crammed onto right page |
Like your Future Log, go ahead and fill in all the things you know about now. As each new month rolls around, you'll flip to your Future Log, find the corresponding month, then copy all that month's events from the Future Log into the current Monthly Log. For example, in my Future Log on the right side, you can kind of see that I have Jan. 18: pay Visa bill. Then, on the January Monthly Log, I have Pay Visa bill on Jan. 17 (I decided to move it up a day since I tend to ignore my reminders for a day or two).
On the facing page, write down all your Must Do-s for the month, then see where you can fit them into the month, which you have spread before you, ready to be filled up. I didn't do that for January, which is why it's January 31 and a lot of my Must Do-s are not done. That is user error, not a BuJo failure. :P
I find my Must Do-s list is most effective if I write only the truly Must Do-s, and not my Should Do-s or Want To Do-s. It keeps the list from getting diluted and makes me focus more on getting done the things I really need to get done. I can always make separate lists of SDs and WTDs and add them to the calendar once the MDs are on there.
So you've got your Future Log and your Monthly Log. I'll do one more Log, and then save the rest of the basics for the next post, since this one is getting reeeeeaaaalllly long.
The last log is your Daily Log, and this is where you get stuff done. That is, it's where you list your To-do items, called Tasks. It's also where you keep track of events that occur on that day, or ideas you get, or Deep Thoughts you may have about anything that crosses your mind.
Tasks are listed with a dot to the left of them. Events have a small circle to their left, and Notes have a dash. When a Task is completed, you put an X over the dot. If it's a really important task, you can mark it with a star. I mark mine with five dots (one in the middle and four in the corners) so I can still cross it off with an X when I'm done.

If you don't get the task done the day you scheduled it for (copied from your Monthly Log, the same way you copied Monthly tasks from your Future Log, or something that came up recently), you put a right-arrow over the dot and move it to the next day. This is called Migration, and I'll talk more about it in a future post.
Next post will be on February 3, and I'll finish the Basics of the Bujo, including Rapid Logging, Migration, Narratives, Collections, Signifiers, and my own BuJo hacks for writing. Now I have to wrap up -- the foster cat really wants to walk on the keyboard, so I need to go cuddle her.
Let me know how the BuJo process goes for you!
Subscribe to:
Posts (Atom)